Matter or HomeKit
Add it to Apple Home, Google Home or Home Assistant with Matter, or switch back to the original HomeKit. Wi-Fi, pairings and energy totals survive the switch.
Open preview firmware for the Incipio CommandKit CMNDKT-004 smart outlet. It keeps the original kernel and drivers and adds Matter or HomeKit, live power monitoring and signed online updates. Everything runs on your home network, no cloud account needed.
The original bootloader, kernel and Wi-Fi driver stay in place; only the apps on top are replaced. Your factory data and the original firmware in the second slot are kept.
Add it to Apple Home, Google Home or Home Assistant with Matter, or switch back to the original HomeKit. Wi-Fi, pairings and energy totals survive the switch.
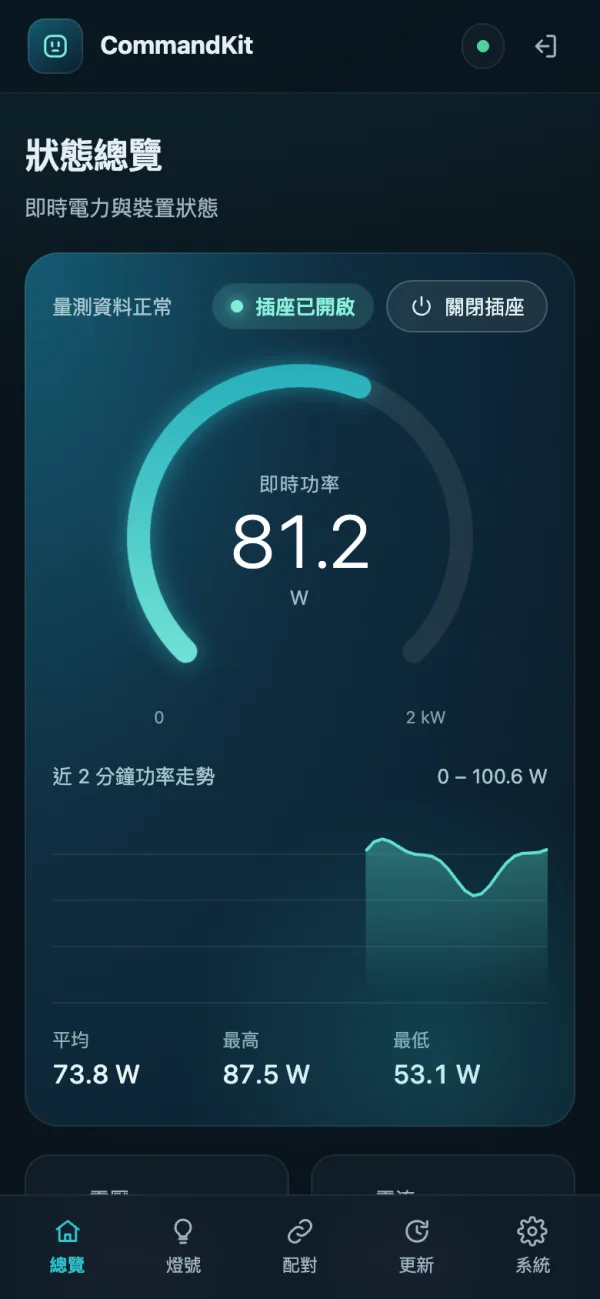
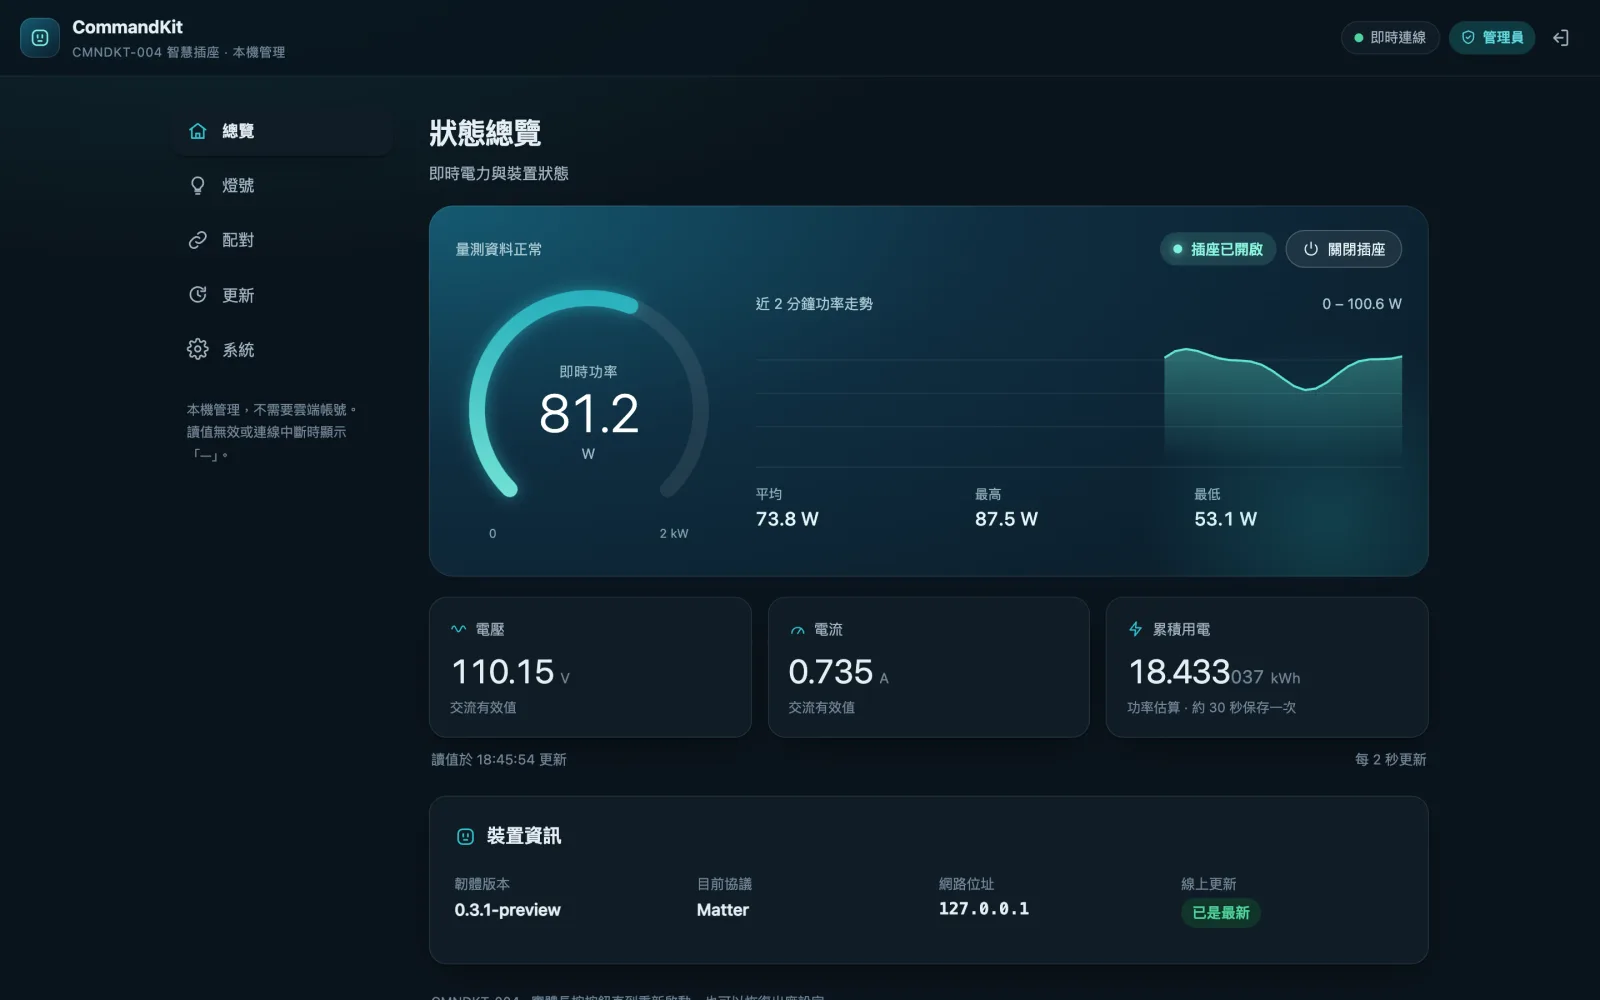
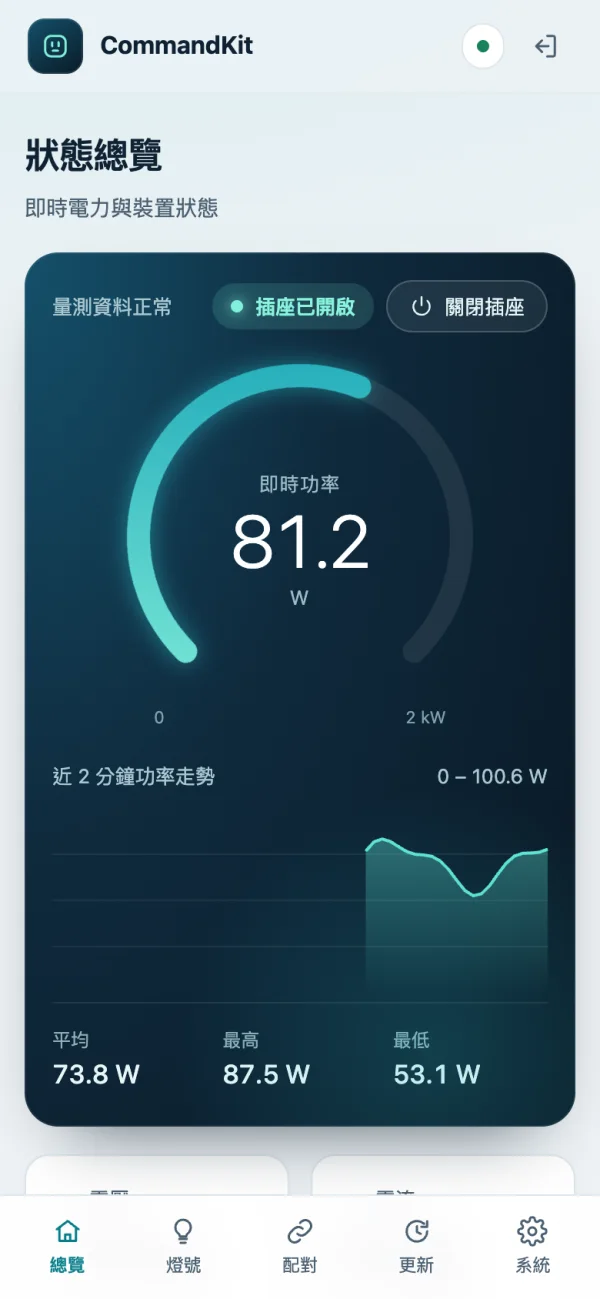
Voltage, current and power refresh every 2 seconds, plus an estimated energy total in kWh. Matter apps can read the standard power clusters too.
The dashboard checks for new versions when you open it. Install with one tap. Every package is verified with Ed25519; anything for another model or platform is rejected.
Six LED modes, a “find my outlet” blink and a lights-off schedule that can cross midnight. Shared by HomeKit and Matter.
Guests can only look. Changing settings needs your admin password, stored as a PBKDF2 hash. Nothing goes through a cloud service.
Only the first-slot file system is written. The bootloader, MAC address, radio calibration, original HomeKit data and second slot are never overwritten.
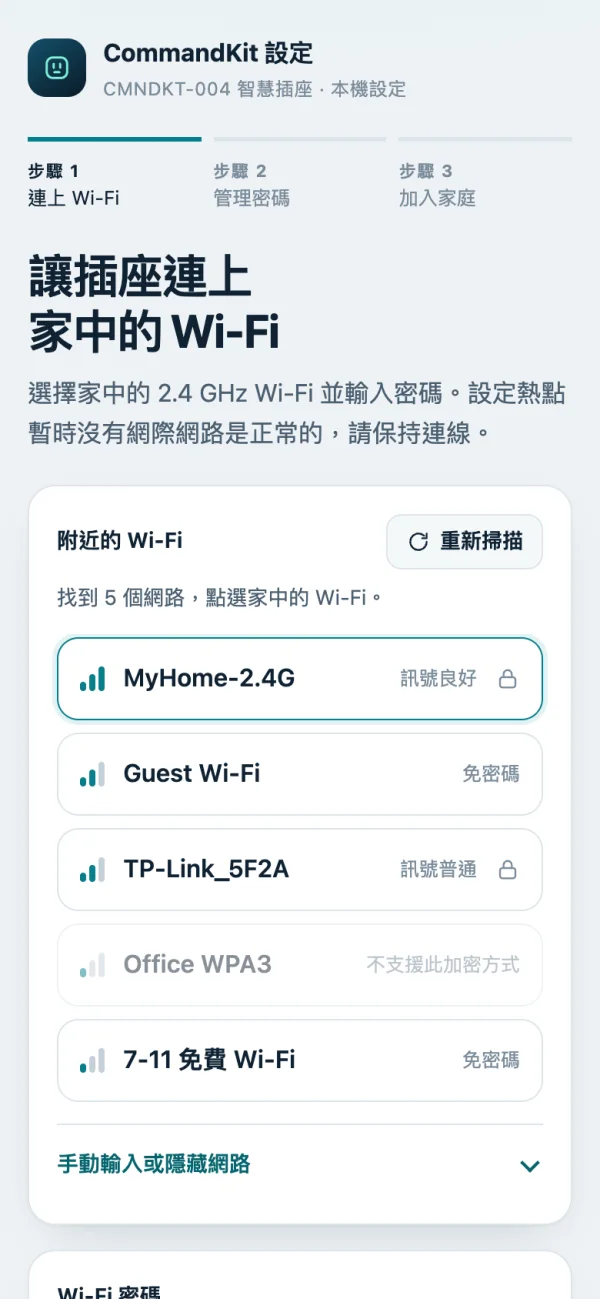
Both the setup hotspot and the dashboard were redesigned. They work well on phones and computers, with dark mode. (The firmware UI is in Traditional Chinese.)
Follow the chapters in order. Factory outlets that meet the conditions can be installed from the factory web page without opening them; otherwise you use a flash programmer. After the first install, every update happens in the browser.
There are two ways to do the first install. Check the outlet’s firmware and settings on its factory update page, http://outlet-ip/upload.htm, then pick one.
Upload the first-install file on the factory update page. This has been tested on a real outlet.
10219-1531, running from Active Bank 2, Enable Dual Firmware tickedOpen the outlet and write only the first slot with a programmer. Works with any factory version.
matter-8m-region.bin and .json from the releasegit clone https://github.com/lee98064/incipio-commandkit.git cd incipio-commandkit python3 -m pip install -r tools/requirements.txt
Put matter-8m-region.bin and matter-8m-region.json in artifacts/releases/. To build flashrom, see the build guide.
Follow the method you picked in chapter 1. Both keep the bootloader, MAC address, radio calibration, original HomeKit data and the factory firmware in the second slot.
Get commandkit-matter-v0.3.1-public-first-install.bin. It’s a shared public file with no device keys; each outlet creates its own identity and Matter code the first time it starts.
Close the case, plug the outlet in, and leave nothing plugged into it. Find its IP in your router’s device list and open http://outlet-ip/upload.htm. Check it shows 10219-1531, Active Bank 2 and Enable Dual Firmware ticked. Don’t change the dual-firmware setting.
At the top of the page, click Select File, choose the first-install file, then click Upload.
Wait for the countdown and restart, and keep the outlet powered. Don’t click “Reboot Form Backup Bank Now”. The first start creates the device identity, so it can take a little longer.
When the CommandKit-Setup-XXXXXX hotspot appears, continue with chapter 3.
The first-install file is for factory outlets only. It resets the data area. If the outlet already runs this firmware, update it from the dashboard instead, or you’ll lose pairings, the admin password and the energy total. matter.ota and matter-8m-region.bin don’t work on the factory update page.
The tool reads two full backups and compares them byte by byte, builds an image made for your outlet from that backup, then writes only the first-slot file system. If the chip, the backups or any check doesn’t match, it stops.
Unplug the outlet, open the case, clip onto the GD25Q64 (mind pin 1) and connect the CH341A.
python3 tools/flash.py backup --session private/read-01 \
  --mains-disconnected --voltage-3v3 --no-other-supply
The three flags say you have checked that mains is disconnected, the voltage is 3.3 V and nothing else is powering the board. The tool cannot measure this for you. Backups go to private/read-01/; keep them safe.
python3 tools/flash.py prepare \
  --backup1 private/read-01/before-1.bin --backup2 private/read-01/before-2.bin \
  --release artifacts/releases/matter-8m-region.bin \
  --manifest artifacts/releases/matter-8m-region.json \
  --profile private/outlet-a --output private/matter-target.bin
This step doesn’t touch the hardware. The --profile folder holds this outlet’s identity. Reuse it if you ever reinstall the same outlet, so its Matter code stays the same.
python3 tools/flash.py write \
  --image private/matter-target.bin --record private/matter-target.bin.json \
  --session private/write-01 \
  --mains-disconnected --voltage-3v3 --no-other-supply
Only 0x130000–0x3BFFFF is written. The tool then reads the whole chip back and compares it. write_verified_not_boot_tested means the write was verified.
Take off the clip and every wire, put the case back together, then plug the outlet in.
If a check is unclear, don’t plug it in. Keep the session folders and the original backups; tools/flash.py restore brings back the original file system.
Plug the outlet in. It opens a setup hotspot, and the LED blinks every half second while it waits.
On your phone, pick the Wi-Fi network CommandKit-Setup-XXXXXX. There is no password. It has no internet access, and that is normal.
If it doesn’t pop up on its own, open http://192.168.1.254/ in your browser.
Tap a 2.4 GHz network and enter its password, or type the name of a hidden network. 5 GHz and WPA3-only networks are not supported.
At least 8 characters. You’ll use it to sign in to the dashboard. If you forget it, the only way back is a factory reset.
The page shows this outlet’s own QR code and 11-digit setup code. Take a photo. The code stays the same after restarts and updates.
The outlet uses Matter by default.
The phone and the outlet need to be on the same network.
Open Apple Home, Google Home or Home Assistant and choose “Add accessory” or “Add device”.
Use the QR code or 11-digit code you saved in chapter 3 and follow the app.
About “uncertified accessory” warnings: this firmware uses Matter development test certificates, so your home app may warn you. Each platform treats test devices differently; follow that platform’s official instructions.
Sign in to the dashboard, pick HomeKit on the Pairing tab and save; the outlet restarts. HomeKit uses the code on the outlet’s original label. In HomeKit mode the dashboard pauses live readings and kWh counting.
| What | How |
|---|---|
| Open the dashboard | Find the outlet’s IP address in your router’s device list and open http://outlet-ip/. It forwards to :18082. |
| Guest view | Anyone on your network can see live power, voltage, current, energy and the firmware version without signing in. |
| Admin | After signing in you can switch the outlet on or off from the overview (Matter mode), change LED settings, switch protocols, reopen pairing, and change Wi-Fi or the admin password. |
| Physical button | A short press turns the outlet on or off. Holding it until the outlet restarts does a factory reset. |
It checks for new versions on its own. When one is out, the overview page says so.
Sign in as admin and tap “Download and update” (下載並更新).
You’ll see download, upload and verify, install and restart. It takes about 1 to 4 minutes. Keep the outlet powered, then sign in again.
No internet? Download matter.ota on a computer and pick or drop it under “Manual update”. Normal updates keep the device identity, Wi-Fi, admin password, home pairings and energy total.
The update feed your outlet reads is this site’s updates/index.json. The outlet only installs packages that are correctly signed, for the right model, and newer than what it runs. It never downgrades.
| You want to | Do this | What is erased |
|---|---|---|
| Pair again | Dashboard → Pairing → clear pairings for the current protocol | That protocol’s home pairings |
| Reset the energy total | Dashboard → System → reset | Energy total |
| Forgot the password / start over | Hold the button until the outlet restarts, or Dashboard → System → factory reset | Admin password, Wi-Fi, both pairings, energy total |
| Go back to the original file system | Run tools/flash.py restore with the programmer | This firmware (restored from your backup) |
A factory reset keeps the MAC address, radio calibration, original HomeKit data and this outlet’s Matter identity.
The outlet couldn’t join your Wi-Fi. Make sure you picked a 2.4 GHz network, typed the right password, and your router isn’t set to WPA3 only. Join CommandKit-Setup again and redo the setup.
Look in your router’s connected devices or DHCP list. Reserving a fixed IP for the outlet makes the dashboard easier to reach later.
The updater writes the data first and restores the file-system marker last, then reads everything back. If the new version fails to start, the outlet keeps a recovery page where you can install a newer fix. If it can’t boot at all, you’ll need the programmer to restore it. This is not a full A/B automatic rollback.
Yes, if it runs factory firmware 10219-1531 from Active Bank 2 with Dual Firmware enabled: use method A in chapter 2. Other versions need the programmer (method B).
No. matter-8m-region.bin is a partial image: only the first-slot file system has data and the rest is 0xFF. Use the tool to build it from your own backup and write only the allowed range.
No. Control and measurements stay on your home network. The only outside request is your browser reading the update feed from this site when you open the dashboard.
No. This project has nothing to do with Incipio. It is research and preview firmware for outlets the author owns. Weigh the risks yourself.
If your outlet already runs this firmware, just update from the dashboard. These files are for manual updates and first installs.
matter.ota (2.6 MB) for outlets that already run this firmware. Upload it from the dashboard.
Download matter.otafirst-install.bin for the factory web upload (method A), and matter-8m-region.bin/.json for the programmer (method B; personalize it, never flash the whole chip).
Full source, reverse-engineering notes, build steps and change log.
GitHub